A standard 400-square-foot residential paver patio in the Inland Empire takes 3 to 5 business days to install, while a typical 600-to-800-square-foot two-car driveway requires 5 to 7 business days from demolition to final compaction. Specialized site conditions—such as deep expansive clay excavation in Eastvale, subgrade alluvial boulders along the Claremont and Upland foothills, or municipal encroachment permits in Rancho Cucamonga—can add 1 to 3 working days to the total schedule.
Structured hardscape timelines managed by Rancho Cucamonga Pavers adhere to strict engineering benchmarks established by the Interlocking Concrete Pavement Institute (ICPI). Understanding how each phase is executed—from mechanical excavation to sand activation—gives homeowners a clear expectation of crew presence, machinery usage, and site accessibility.
Project Timeline Breakdown by Hardscape Type
Installation timelines scale based on total square footage, required excavation depth, and vehicle load engineering.
| Project Type | Common Square Footage | Base Depth Standard | Average Installation Time | Typical Crew Size |
|---|---|---|---|---|
| Walkway / Entry Path | 100 – 250 sq. ft. | 4 inches Class II Base | 1 to 2 Days | 2 – 3 Technicians |
| Small Backyard Patio | 200 – 400 sq. ft. | 4 to 6 inches Class II Base | 3 to 4 Days | 3 – 4 Technicians |
| Large Patio / Pool Surround | 500 – 1,000 sq. ft. | 4 to 6 inches Class II Base | 5 to 8 Days | 4 – 5 Technicians |
| Standard Two-Car Driveway | 600 – 800 sq. ft. | 6 to 8 inches Class II Base | 5 to 7 Days | 4 – 6 Technicians |
| Commercial / RV Access Pad | 1,000 – 2,000+ sq. ft. | 8 to 12 inches Class II Base | 7 to 12 Days | 5 – 7 Technicians |
Step-by-Step Installation Phases
Professional paver installation consists of five sequential phases. Skipping or rushing any single phase leads to base settling, joint failure, and lateral stone drift.
1. Pre-Construction: Utility Locating (48 Hours Prior)
Before any mechanical excavator touches the property, California state law mandates contacting Underground Service Alert of Southern California (DigAlert). Under California Government Code 4216, excavators must notify utility operators two full working days before breaking ground. Gas lines, electrical conduits, and fiber-optic cables frequently run beneath residential driveways and front walkways at depths as shallow as 8 to 12 inches.
2. Demolition and Subgrade Excavation (Days 1–2)
Crews remove existing grass, dirt, or cracked concrete using skid-steer loaders and mini-excavators.
- Depth Requirements: Patios require 7 to 9 inches of total excavation (4 to 6 inches for crushed base, 1 inch for sand bedding, and 2-3/8 inches for the paver stone). Driveways require 10 to 12 inches of excavation to accommodate an 8-inch road base.
- Hauling & Recycling: Excavated soil and broken concrete slabs are loaded onto dump trucks and delivered to regional processing facilities such as Mid-Valley Disposal or Vulcan Materials.
- Subgrade Compaction: The exposed subgrade soil is graded with a 1% to 2% slope away from the home foundation and compacted using a commercial plate compactor to 95% Standard Proctor density.
3. Geotextile Placement and Base Compaction (Days 2–3)
The aggregate sub-base provides structural load support for the entire system.
- Geotextile Membrane: A heavy non-woven geotextile stabilization fabric is laid over the native dirt subgrade to stop native soil from mixing into the rock base.
- Aggregate Base Installation: Caltrans Class II aggregate base rock is distributed in shallow 2- to 3-inch layers (lifts).
- Vibratory Compaction: Each lift is watered to achieve optimum moisture content and compacted with a heavy reversible plate compactor delivering 5,000 to 9,000 pounds of centrifugal force. Driveway bases receive 3 to 4 compacted lifts to achieve 98% Standard Proctor density.
4. Bedding Sand Screeding and Paver Laying (Days 3–5)
Once the aggregate base is flat, hard, and pitched for drainage, the setting bed is prepared.
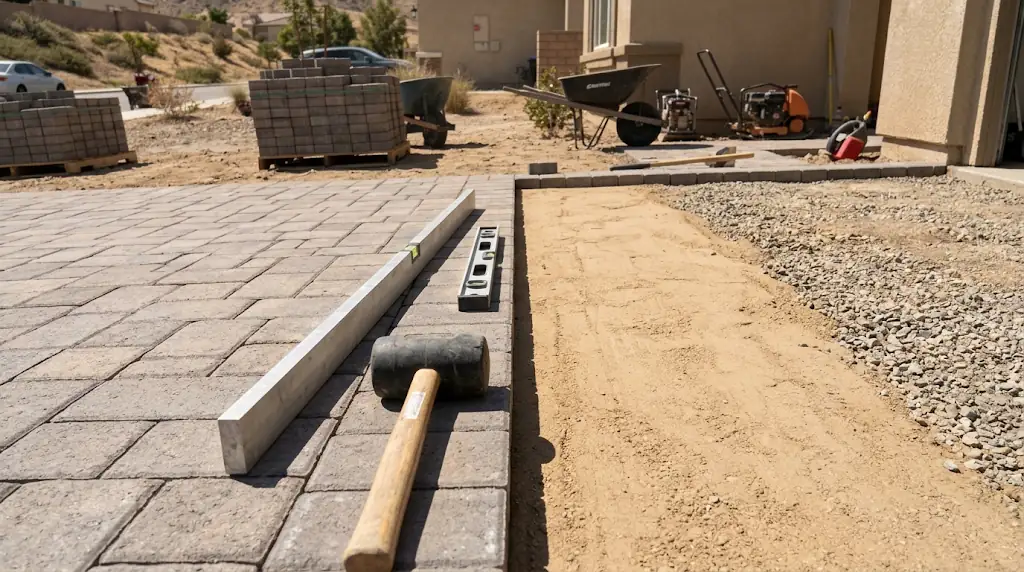
- Screeding Sand: One inch of dry, uncompacted ASTM C33 coarse concrete sand is screeded flat across the base using 1-inch screed rails. Crew members do not walk on the screeded sand layer.
- Setting the Pavers: Pavers are hand-laid in the specified pattern (e.g., 45-degree herringbone for driveways or 3-piece modular ashlar for patios).
- Diamond Saw Cuts: Perimeter edges, curved garden lines, and transitions against walls are marked and cut using commercial masonry wet saws equipped with continuous-rim diamond blades.
5. Edge Restraints, Sanding, and Final Compaction (Days 4–7)
The final phase locks the modular pieces into a unified, flexible pavement.
- Edge Restraint Installation: Heavy-duty snap-edge restraints or poured concrete submerged curb borders are anchored into the aggregate base using 10-inch steel spikes driven every 12 inches.
- Initial Plate Compaction: A mechanical compactor fitted with a protective rubber urethane mat passes over the dry pavers to seat them down into the top of the ASTM C33 bedding sand.
- Polymeric Joint Sanding: Specialized polymeric sand is swept into the paver joints until completely full. A final compactor pass vibrates the sand deep into the joints, followed by a second sweeping pass to top them off.
- Water Activation: The surface is blown clear of all dust, followed by controlled misting with clean water to activate the binding polymers.
Inland Empire Factors That Alter Project Schedules
Regional soil variations, seasonal weather patterns, and municipal requirements directly affect construction speed.
Expansive Valley Clays vs. Rocky Alluvial Foothills
Subsurface soil composition dictates excavation difficulty:
- Eastvale & Chino Hills: Heavy, plastic clay requires deeper trenching (up to 12 inches for driveways) and slower, layered moisture compaction to prevent long-term settling.
- North Rancho Cucamonga, Claremont & Upland: Properties north of the 210 Freeway sit directly on rocky alluvial wash ground. Crews frequently encounter subterranean granite river boulders ranging from 12 to 36 inches across. Extracting buried boulders requires hydraulic breaker attachments, which can add 1 to 2 days to the site preparation phase.
Santa Ana Winds and Summer Heat Protocols
Fontana and Rancho Cucamonga frequently experience 50-to-70-mph gusts channeled through the Cajon Pass during autumn Santa Ana wind events. High winds prevent the installation of dry polymeric sand, as fine polymers blow away before they can be swept into joints and activated with water. In these conditions, sanding is paused until winds subside below 15 mph.
During July and August heat waves, when ambient temperatures exceed 105°F, installation crews start work at 6:30 AM to complete screeding and stone laying before pavement surfaces reach 140°F, ensuring proper polymeric sand curing.
Municipal Right-of-Way Inspections
Driveway projects requiring apron replacement across public sidewalks or curb cuts in cities like Rancho Cucamonga, Upland, and Ontario require city engineering pre-pour inspections. Waiting for municipal inspectors to review forms and rebar adds 24 to 48 hours to the project timeline compared to private backyard patio installations.
Usability: Pavers vs. Poured Concrete
A major advantage of interlocking pavers is their immediate return to service compared to poured concrete slabs.
| Milestone Metric | Poured Standard Concrete | Interlocking Concrete Pavers |
|---|---|---|
| Installation Phase | 2 to 3 Days | 3 to 7 Days |
| Foot Traffic Allowed | 24 to 48 Hours | Immediately upon sand drying (12–24 Hours) |
| Light Vehicle Parking | 7 to 10 Days | Immediately after final compaction |
| Full Heavy Vehicle Load | 28 Days (Full chemical cure) | Immediately upon completion |
| Risk of Weather Delays During Cure | High (Rain ruins wet surface) | None (Pavers are pre-cured at factory) |
Poured concrete takes less time to pour, but property owners cannot drive on it for up to 10 days while the cement matrix hydrates. Interlocking concrete pavers take slightly longer to prepare and set, but the driveway is fully load-bearing the moment the polymeric sand finishes setting.
Schedule Your On-Site Installation Assessment
Knowing your project’s realistic timeline prevents unexpected disruptions to your daily routine, parking access, and property use. Experienced installation teams complete typical backyard patios in less than a week and standard driveways in five to seven business days, handling site preparation, municipal compliance, and clean execution from start to finish.
To review your project layout, evaluate site access, and obtain an exact installation schedule for your home, visit our contact page to schedule an on-site consultation with Rancho Cucamonga Pavers.